
2017 USA Wheat harvest is drawing closer, so now is the time to be checking your stripper header over and performing maintenance tasks. A few maintenance tasks are listed below, check your operator’s manual for other routine maintenance tasks.
Get Your Stripper Header Ready For harvest
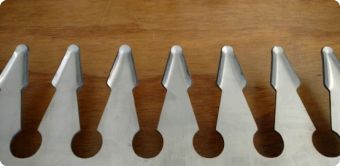
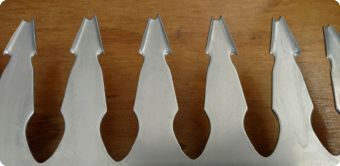
Check the stainless-steel stripping rotor fingers. The stainless-steel stripping rotor fingers should have a nice rounded cup at the tip of the finger and the hole at the base of the finger is approximately 20mm dia. when new. Once the tip of the finger and the hole at the base wears excessively performance of the fingers will be lessened.
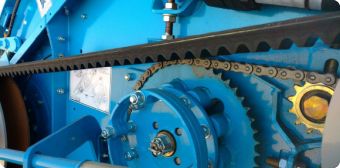
Check wear and adjustment of the auger drive chain and sprockets. CVS and XCV stripper headers use a regular 60-gauge chain, a 60 heavy chain should not be used. Proper chain tightening procedures can be found in your operators manual.
To check the rotor drive belt, look for cracks, splits or glazing on the belt. Damage to the rotor drive belt can indicate a problem with the stripping rotor pulleys.
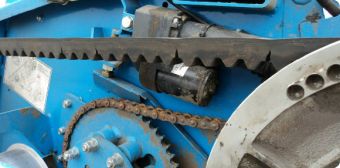
Check the auger slip clutch. Heat marks on the outer clutch pressure plate can indicate clutch plate wear. Auger clutch springs can lose their spring temper over time leading to the auger clutch slipping easier than it should.
Check electrical wiring and hydraulic hoses for damage. Wiring and hoses can be damaged due to weathering or rodents.
Check the gearbox oil. CVS and XCV gearboxes have a breather style oil filler cap, the area around the breather should be kept clean. Using your operator’s manual, check the gearbox oil level and change the oil according to the specified maintenance schedule in the operators manual.
Using the operator’s manual or the maintenance decal affixed to the header, grease the header.
Attach the combine to the header as described in the operators manual and run the header through the full header RPM range and make sure that the header monitor works correctly.
